
Ribbon Bar File Menu

To display the "File Menu in the main window, press the file button of the Ribbon Bar. If you are using one of the Office 2007 looks, this will be a large round button in the upper left corner. If you are using one of the Office 2010 looks, it will be a blue tab labeled "File" on the left end of the ribbon bar. The File Menu includes options for project backup/restore, printing and other miscellaneous functions. It also provides a list of the most recently used projects. Pressing the button display the File Menu Dialog.
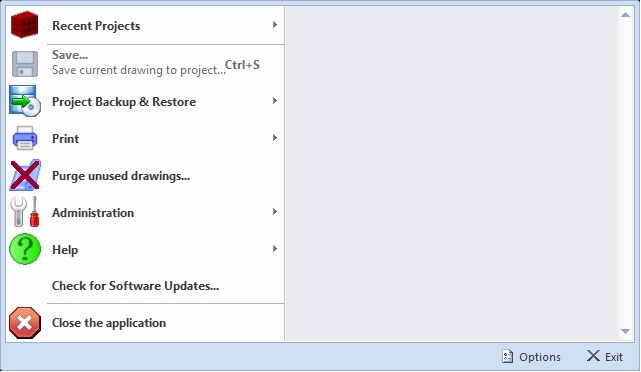
Recent Projects
Select this menu option to display a list of the most recently opened projects. You can click on any project to open it.
Save...
Save the information for the current drawing as part of a project.
This is only needed when you are working on a drawing outside
of a project. When you work on a project drawing, your work is saved
automatically.
When you select the menu option, the
Drawing Properties Window is displayed. Complete the information
in this window (including assigning it to a project) and press OK.
All subsequent changes to the drawing will be saved automatically.
Project Backup & Restore
Backup project... -
Dimension keeps all project and drawing information in a single
database. Sometimes you want to extract the information for a
single project and save it. You can later restore the project
information to re-create the project in your system or on
another system.
When you select this menu option, a standard Windows File Dialog
is displayed, allowing you to define the folder and file where
you want to store the project information. Specify the file/folder
information and press the "Save" button. The project information
will be backed up to the specified file.
Warning: Backing up the project information saves all the project
information stored in Dimension but it does NOT save the
drawing files.
At the completion of the backup, a hint window is optionally displayed.
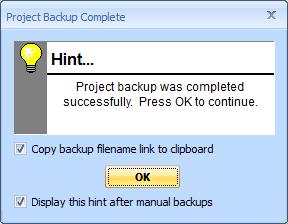
The window includes a checkbox to copy a backup file link to the clipboard.
This is useful when backup a project to a common server then sending an email
to a co-worker who will use the backup file.
If you check the box, the link will be copied when you close the hint window.
When editing the email, just paste the link into the email body.
If you un-check the box "Display this hint after manual backups",
the hint window will not be displayed in the future. You can turn it back on
using the "Hint" tab of the User Preferences.
This capability is not available in the Basic Viewer.
Backup and zip project... -
This option can be used to quickly save or transfer project
information, plus the drawing files. The process creates a single
file with both the project information and the drawings. The file
uses a standard compression format that's also used by WinZip ©
and other compression utilities. You don't need a utility program
because Dimension will extract the drawing information and the drawing
files. For more information see
The Project Backup and Zip Wizard.
This capability is not available in the Basic Viewer.
At the completion of the backup, a hint window is optionally displayed as explained above.
Restore project... - Project Files are created using either the backup commands described above or the "File/Project Backup..." or "File/Project Backup and Zip..." options of the Main Menu. The "Backup and Zip" options include the project information plus drawings in a single "zipped" file. You can re-create a project by restoring from the previously generated file. For more information, see Project Backup.
Print current drawing... - Select this menu option to print the current drawing. When you select it, the Print Drawing Dialog is displayed. Complete the information in this window and press OK to print part or all of the drawing.
Batch Printing - Select this menu option to display a submenu of batch printing commands. The submenu options will be disabled in the Basic version.
- Add Current drawing to queue - The drawing currently displayed in the main window is added to the print queue.
- Add drawings via list - The Batch Printing Drawing Selection Window is displayed. You can select drawings to be added to the print queue.
- Edit Default Printer Configuration... - The Batch Printing Printer Configuration Window is displayed and can be edited. This is the printer configuration assigned to drawings as they are added to the queue.
- Print drawings in queue - When you start the application, the actually printing process is suspended. This allows you to review the queue before any drawings are printed. Select this option to start printing. Once Printing is started, you can suspend it using this same menu selection.
- Edit/review printing queue - The Batch Printing Status Window is displayed. You can use this window to review the status of background printing and edit the queue.
For more information on batch printing, see the Batch Printing Overview.
Printer Setup... - Select this menu option to select a printer and/or change the setup of the printer. When you select it, a Windows Printer Setup Dialog will be displayed. The operation of the dialog will depend on your windows version and the selected printer.
Purge unused drawings...
Purge unused drawings from a project. When this option is selected, the Purge Unused Drawings Wizard will be displayed to filter, select then purge unused drawings.
Administration
Set user ID - Select this menu option to set or change your user ID. In a multi-user environment, the user ID is used to keep separate project-specific preferences for each user. These preferences include the last drawing viewed for the each project, the last view used for each drawing in the project, etc. When you select this option, the User ID Window will be displayed.
Install software license... - Select this menu option to set, change or review your Dimension license information. Many features of Dimension are unavailable without a valid license. When you select this menu option, the Dimension License Installation Window will be displayed.
Install add-on license... - Select this menu option to install or review add-on licenses. It can also be used to install trial add-on licenses. Add-on licenses provide additional capabilities not included in the main license. When you select this menu option, the Dimension Add-on License Installation Window will be displayed.
Manage Concurrent Licenses... - Select this menu option to manage concurrent licenses. When you select this menu option, the Dimension Concurrent License Window will be displayed.
Network proxy settings... - Select this menu option to enter or edit the network proxy settings for your computer. Proxy settings are used when Dimension needs to authenticate itself in order to access the Internet. When you select this menu option, the Dimension Proxy Server Settings Window will be displayed.
Standards Seecurity Setup... - Select this menu option to enable or edit the standards security. See Standards Security Overview for an overview of standards security. If security is enabled and you are not an administrator you will need to enter a password. After that, the Standards Security Setup Window will be displayed
Help
Display Online Training Guide - This will display a online guide for new users to learn about the features The guide will display in an external browser window.
Dimension Help - Select this menu option to display the Dimension help information. The table of contents will be displayed on the left and the Getting Started help page on the right.
Welcome Page... - Select this option to display the welcome page shown at first run.
Join an Online Demonstration - Select this option if you are speaking with a Dimension salesperson and they ask you to join an online demonstration. Your web browser will be started and directed to a demonstration login page.
Join a Support Session - Select this option if you are speaking with a support person and they ask you to join a support session. Your web browser will be started and directed to a session login page.
Display Notification Messages... - Select this option to display the Notification Window with various messages. These could include expiring maintenance agreements or subscription billing problems as well as notices of software upgrades and/or newly published newsletters.
About Dimension - Select this menu option to display information about Dimension. When you select it, the About Dimension Window will be displayed.
Check for Software Updates...
Select this option to see if you're using the latest version of the software. If you are, you will get a simple message. If you aren't, a notification window will be displayed describing the latest enhancements. The window also has a link you can click to install the software updates. If you click the install link, you will need to exit the application.
Close the application
Select this menu option to exit the application. You will be prompted to complete any actions and save any changes.
Options

Press this button to configure the Quick Access Toolbar
Exit

Press this button to exit the application. You will be prompted to complete any actions and save any changes.