
Pattern Search Edit Window
As described in the Pattern Search Overview, the third step in a pattern search uses the Pattern Search Edit Window to clean up the pattern and specify parameters for the search.
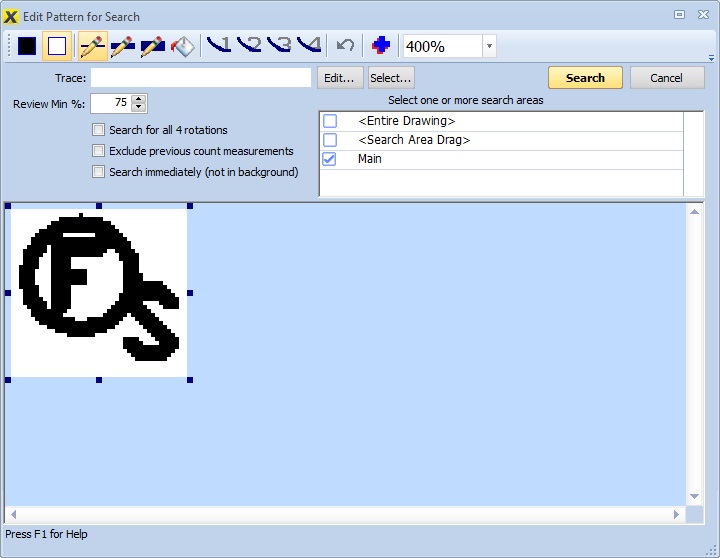
Figure 1: Pattern Search Edit Window
Most of the window is filled with the pattern itself. The toolbar at the top of the window has buttons an controls to edit the pattern and control how it is displayed.
Toolbar Buttons and Controls
Color Buttons
Pattern editing is done by drawing in black or white. One of the buttons below is always selected to determine which color is used.
Draw in Black
When this button is selected, the pen tools and the fill tool draw in black.
Draw in White
When this button is selected, the pen tools and the fill tool draw in white.
Drawing Buttons
When the mouse is held down and moved across the pattern, it draws in one of the modes below.
Draw with Narrow Pen
When this button is selected, drawing is done with a pen that is 1 pixel wide.
Draw with Medium Pen
When this button is selected, drawing is done with a pen that is 3 pixel wide.
Draw with Wide Pen
When this button is selected, drawing is done with a pen that is 5 pixel wide.
Fill Contiguous Pixels
When this button is selected, drawing on a pixel fills that pixel and all contiguous pixels of the same color with the pen color.
Smoothing Buttons
Smoothing buttons operate on the entire drawing. Smoothing eliminates pixels that are a different color that those surrounding it. Each pixel's color is compared to the color of the eight pixels surrounding it. If the majority of the cells are another color, the pixel's color is changed to match. "Majority" is based on the smoothing level below.
Smooth Level 1
Change the pixel color when all of the surrounding pixels differ.
Smooth Level 2
Change the pixel color when 7 or more of the surrounding pixels differ.
Smooth Level 3
Change the pixel color when 6 or more of the surrounding pixels differ.
Smooth Level 4
Change the pixel color when 5 or more of the surrounding pixels differ.
Other Buttons and Controls
Undo Last Operation
Pressing this button reverses the last operation. Operations include drawing, smoothing, moving and resizing.
Compare Mode
In comparison mode, the current pattern is shown in comparison to
the original pattern. Pixels that are white in both cases are shown
in white. Pixels that are black in both cases are shown in dark gray.
Pixels changed from black to white are shown in a light red. Pixels
changed from white to black are shown in dark blue.
Note: These are the default colors. Different colors can
be selected via the
User Preferences.
Pattern Zoom Level
Select from this drop-down list to change the zoom level for displaying the pattern.
Changing the Search Pattern Size
There are small dark blue rectangles on the sides and corners of the pattern display. You can change the size of the pattern by dragging these handles in or out.
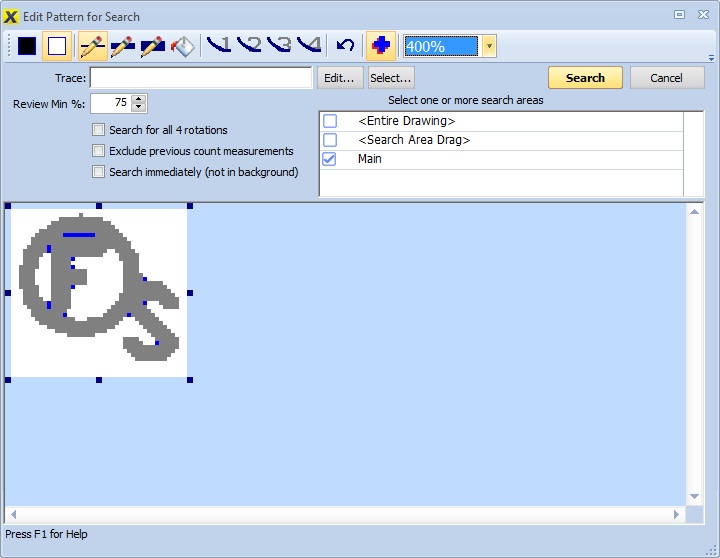
Figure 2: Pattern Search Edit Window, Comparison Mode
Search Parameter Controls
Trace: - This field display the trace that will be used when the patterns found are converted into a measurement. You can press the "Edit..." button to edit the trace and/or press the "Select..." button to select a standard trace.
Note: You will have another opportunity to edit or select the trace during the review process.
Review Min %: - During the search, potential matches are evaluated based on what percentage of the pixels match the pixels in the desired pattern. Potential patterns that meet or exceed this percentage will be included for review after the search.
Search for all 4 rotations (slow) - If this is selected, a search will be made for the pattern and for patterns that are 90, 180 and 270 degree rotations of the pattern. This means the search will take up to four times as long. Checking this box is unnecessary when the rotating the pattern will not significantly change it.
Exclude previous search matches - It's not unusual to perform separate searches for patterns that are similar. For example, you might search for a square containing the letter "S", then search for a square with the letter "O". The first search would pick up some of the "O" squares but they would be de-selected during the review process. The subsequent search for the "O" squares could also pick up some "S" squares.
If this box is checked, any measurement points that were generated from a previous pattern search are omitted from the results. This would keep the "S" squares out of the "O" square results.
Search immediately (not in background) - If this is checked, the search will be done as soon as the "Search" button is pressed (or after dragging an area if you select that option). A progress dialog will be displayed. When the search is complete the review will be invoked automatically.
If its is NOT checked, the selected areas will be searched in the background and displayed in the Control Panel Search Control. You can then review them at your convenience.
Select one or more search areas - This list lets you select the areas you wish to search. There is an option to search the entire drawing and another option to drag an area to be searched specifically for this search. If you have previously defined rectangular or polygon search areas using the Pattern Search Toolbar or the Ribbon Bar Drawing Tab, they will be included in the list. Eliminating significant areas can greatly reduce the search time.
Search - Once you have edited the pattern and set the search parameters, press this button to start the search. For immediate searches, a progress window will displayed during the search. When the immediate search in complete, the Pattern Search Review Window will be displayed to review the results and finalize the search.
For Background searches, the progress is displayed in the Control Panel Search Control. You can then review them at your convenience.
Cancel - Press this button to cancel the pattern search.