
Ribbon Bar Work Zone Tab

The Work Zone Tab is for the creation and editing of work zones and reviewing the Work Zone Report described in the Work Zone Overview
Add Work Zones

Rectangle Zone
Press this button to create a work zone rectangulararea. These areas define a specific area to group measurement quantities or parts of measurements’ quantities in a work zone. When you press the button, a Work Zone Description window will be displayed to enter the name of the work zone. The description will appear in the Work Zone Area. After entering the description, click on two opposing corners of the desired rectangle.

Polygon Zone
Polygon Zone - Press this button to create a work zone polygon area. These areas define a specific area to group measurement quantities or parts of measurements’ quantities in a work zone. When you press the button, a Work Zone Description windowwill be displayed to enter the name of the work zone. The description will appear in the Work Zone Area. After entering the description, click on the points defining the outline of the polygon.
Manage Work Zones

Show/Hide Work Zones
When this button is checked, rectangular and polygon work zones will be visible. When it isn't checked they will be hidden.

Fix Gaps & Overlaps (between Work Zones)
When this button is pressed, the user will be able to eliminate gaps and/or overlaps of work zones. To do so, the user simply holds the mouse down anywhereinside a zone and drags the line toward or away from another zone. See Fix Gaps & Overlaps between Work Zones below for more information.

Work Zone Report
Press this button to display a list of all the measurement and/or partial measurement quantities per work zone in the current project. The Work Zone Report will appear.
Work Zone Properties

Change Text/Foreground Color
Press this button change the text/foreground color of the work zone you're working on. The standard Windows Color Selection Dialog will be displayed. Select the desired color and press OK. If you need help using the color selection dialog, press the "?" button in the dialog's caption then click on the control you want to know more about.

Change Background Color
Press this button change the background color of the work zone you're working on. The standard Windows Color Selection Dialog will be displayed. Select the desired color and press OK. If you need help using the color selection dialog, press the "?" button in the dialog's caption then click on the control you want to know more about.


Line Width
The Line width shows a number in an edit box with a down-arrow button to its right. To change the line width for the work zone you're working on, press the down-arrow button and click on the desired line width in the displayed list.
Transparency
Transparency controls how much of the drawing can be seen through the work zone. Move this slider to the left to make the work zone more transparent. Move it to the right to make the work zone more opaque.

Layer
The layer for the current Work Zone shows with a down-arrow
button to its right.
To change the layer for the Work Zone you're working on,
press the down-arrow button and click on the desired layer
in the displayed list.
Warning: If you select a layer this isn't visible, the work zone
you're working on will disappear (be hidden) when you select or add
another work zone.
Fix Gaps & Overlaps between Work Zones
When creating Work Zones, it’s difficult to line up the Works Zones manually which result in Gaps or Overlaps between the Work Zones. The “Fix Gaps & Overlaps” button is a quick and easy solution to this issue. When this button is pressed, a simple mouse drag could be used to eliminate gaps and overlaps.
In the example below, there is a gap between the Northeast Zone and the Southeast Zone. I want to easily increase the size of the Northeast Zone to line it up with the Southeast Zone. All I need to do is click anywhere in the Northeast Zone (black arrow) and drag the line that appears down across the border of the Southeast Zone as shown in the Figure 1 below.
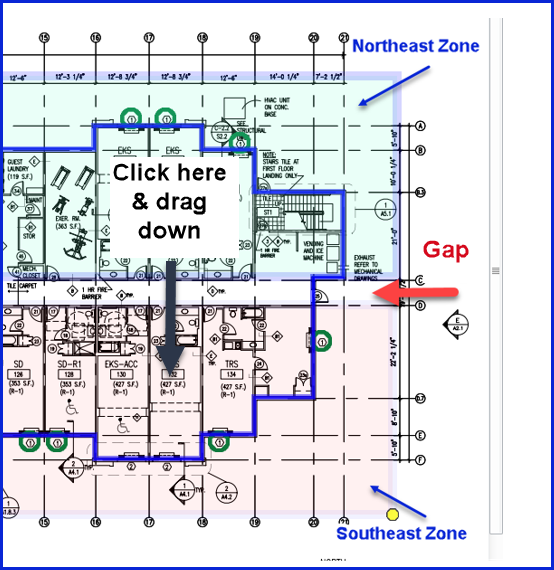
Figure 1
Figure 2 shows the result with no gap.
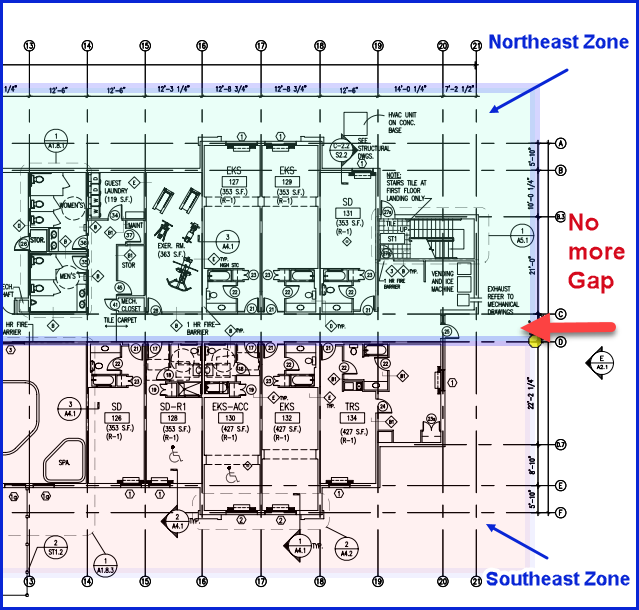
Figure 2
In the next example below, there is an overlap between the Southwest Zone and the Southeast Zone
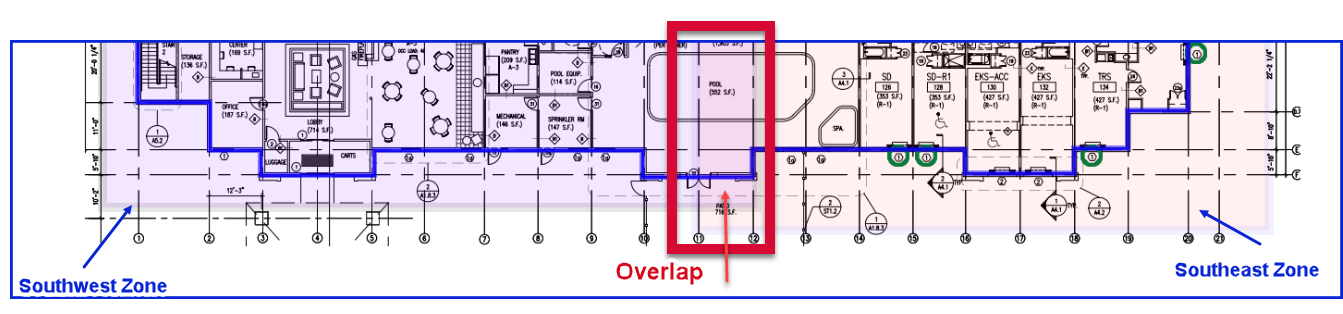
Figure 3
I want to easily decrease the size of the Southwest Zone to line it up with the Southeast Zone. All I need to do is click anywhere inside of the Southwest Zone (black arrow) and drag in the left direction across the border of the Southeast Zone as shown in the Figure 4 below.

Figure 4
Figure 5 shows the result with no overlap.
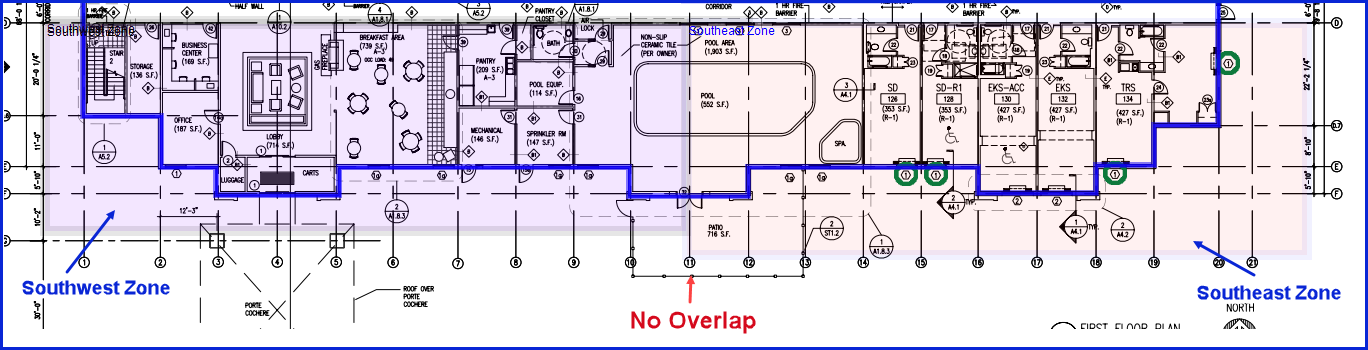
Figure 5