
Quantity Worksheet Formula Bar
The Quantity Worksheet Window and the Item Properties Window have formula bars that aid in the entry of formulas.
As the formula is entered, any time an operand can be entered, the formula bar will display a list of the possible operands. To demonstrate this, we'll go through the entry of the "Foundation" formula shown in Figure 1.
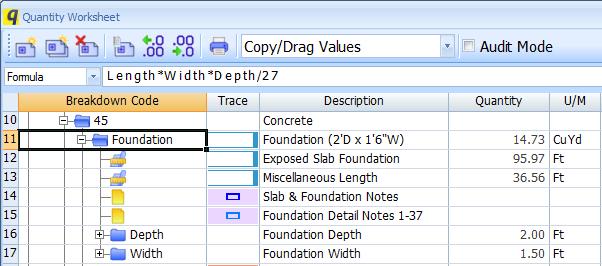
Figure 1: Formula for "Foundation"
To demonstrate how the formula bar works, let's go back to the start of the formula entry process. Figure 2 shows the formula bar with a blank formula.
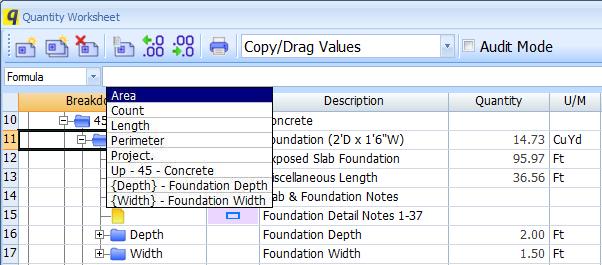
Figure 2: Formula bar with blank formula
Notice the list of possible values below the formula bar. Also notice that when editing formulas in the formula bar, other buttons are disabled. But you can still scroll the worksheet and open and close items.
The first four items in the list are the quantities for the current item (Area, Count, Length and Perimeter). Then comes "Project", this is used to reference an item starting at the top of the worksheet tree rather than at the current item. Then comes "Up". This is a reference to the parent of the current item. The breakdown code and description of the item are displayed after "Up". Finally there are the child items ({Depth} and {Width}. While not shown here, if an Extension is specified for the item, the extension fields will also appear in the list.
In this case, we want to select "Length". We can use the mouse to click on that selection or press the down-arrow cursor key to select it, then press "Enter". Figure 3 shows "Length" highlighted, before pressing "Enter".
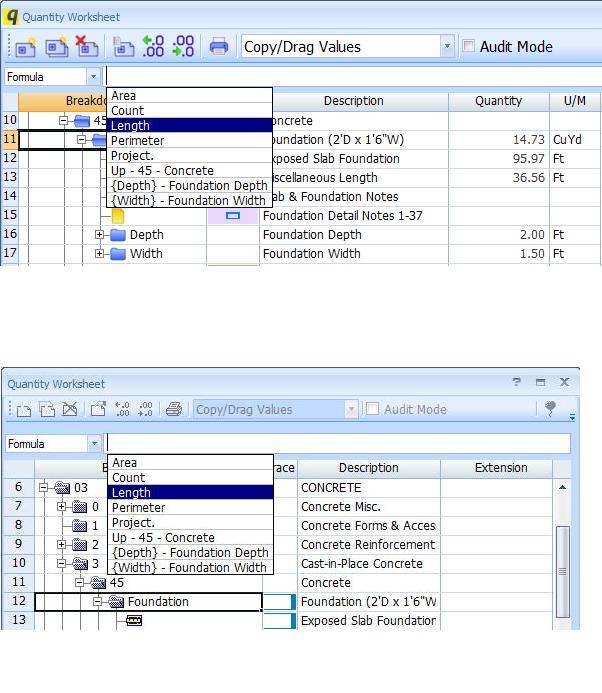
Figure 3: Formula bar with "Length" highlighted
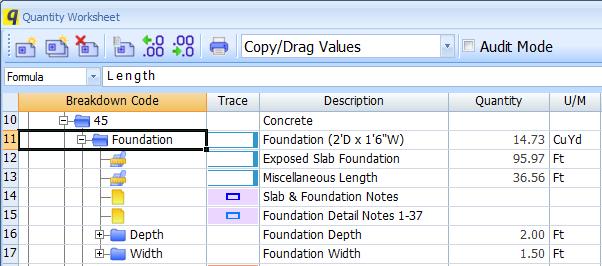
Figure 4: Formula bar after pressing "Enter"
Notice that "Length has been added to the formula. Notice also that no prompt list is displayed. That's because entering another operand right after the "Length" operand would create an invalid formula.
Once we type in a multiply operator (*), a new prompt list appears as shown in Figure 5.
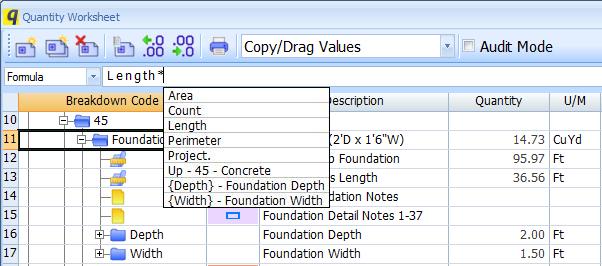
Figure 5: Formula bar after entering "*"
We can type in part of the name from the list and the list will exclude any options that don't match. If we type in the "D" for Depth, the list is reduced as shown in Figure 6.
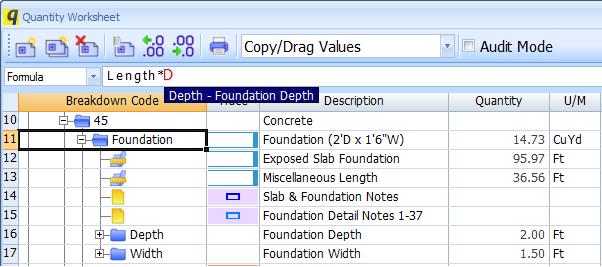
Figure 6: Formula bar with a partial match
Notice that the "D" in the formula is displayed in red. This indicates that the "D" by itself does not create a valid formula. We can press the down-arrow cursor key, then the "Enter" key to select "Depth" as shown in Figure 7.
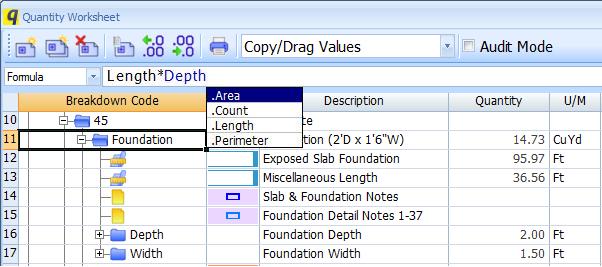
Figure 7: Formula bar with "Depth" item selected
Notice that the "Depth" is displayed in blue in the formula. Notice that there is also a blue outline around the Depth item in the worksheet. This coloring is not displayed when using the formula bar in the Item Properties Window because the Item Properties Window covers the Quantity Worksheet Window. There is a prompt list of extensions we could add to Depth (Area, Count, Length and Perimeter). In this case we don't want to use any of these.
Following steps similar to those above, we can enter the rest of the formula. The completed formula is shown in Figure 8.
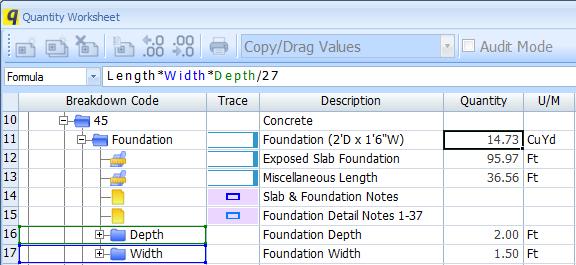
Figure 8: Formula bar with completed formula
Notice that "Width" is displayed in green in the formula bar with a corresponding green outline around the "Width" item. This color coding is displayed while the formula is being edited. We can press the "Enter" key to complete the formula editing process. Figure 9 shows the same formula when not editing.

Figure 9: Formula bar when not editing
Note that the color coding is gone and that the buttons are re-enabled.
The formula bar uses all the normal keys and mouse actions used to edit text in Windows:
- Move the cursor with left/right arrow keys.
- Select text by moving the cursor with left/right arrow keys while holding the "Shift" key down.
- Delete text with the "Delete" or "Backspace" keys.
- Move the cursor by clicking with the mouse.
- Select text by clicking the left mouse button down and dragging the mouse across the desired character.
In addition the keys below coordinate the formula bar with the prompt list:
| Key | Action |
|---|---|
| F2 | Initialize formula editing in the Quantity Worksheet Window |
| Enter |
|
| Escape |
|
| Down-arrow | Select the first or next item in the prompt list |
| Up-arrow | If an item in the prompt list is selected, select the previous item in the prompt list |
| Page Up | Select the first item in the prompt list |
| Page Down | Select the last item in the prompt list |