
Taking off Arcs and Circles
When creating measurements, you occasionally need to digitize the circumference of a circle or an arc (part of a circle). While you can do this by digitizing closely spaced points along the circumference, Dimension allows you to digitize three points then generate the intermediate points automatically.
To automatically generate an arc, first digitize the points up to and including the start of the arc (as shown in Figure 1). The start of the arc can be the first point in the measurement.
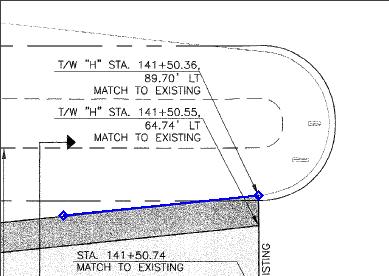
Figure 1: Taking off an arc, digitizing up to the start
Next, digitize a point on the circumference of the arc, near the middle. Then digitize the end point of the arc. Figure 2 shows an example. The sequence is important. The arc will go from the start point, through the mid point, to the end point.
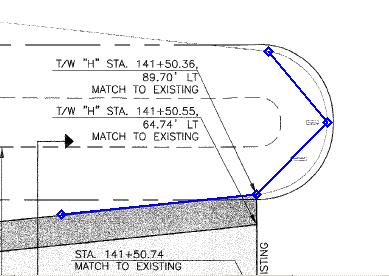
Figure 2: Taking off an arc, after digitizing the middle and end points
To create the arc points, right-click and select "Create Arc" from the context menu. The arc points will be created as shown in Figure 3.
Warning: You may receive an error message. If the start, mid and end points are too close together or lie in a straight line, the arc points can't be calculated accurately.
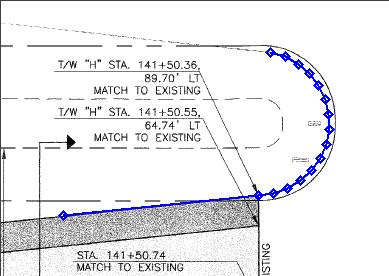
Figure 3: Taking off an arc, after the arc points are created
The distance between the arc points is determined by your preference setting. See the User Preferences Window.
After creating the arc, you can continue adding points. Figure 4 shows a measurement with points after the arc.
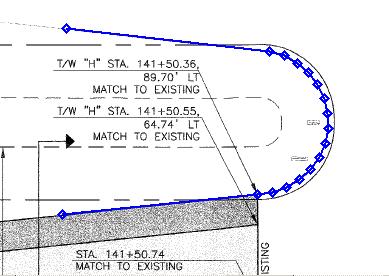
Figure 4: Taking off an arc, points added after the arc
To digitize a full circle, simply digitize two arcs. You can't digitize a circle by placing the end point over the start point. Three separate points are needed to define a unique circle.