
Quantity Worksheet Print Window
The Quantity Worksheet Print Window is used to set various options when printing the quantity worksheet. It is invoked from the Quantity Worksheet Window
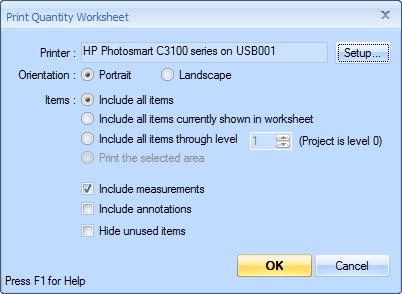
Figure 1: The Quantity Worksheet Print Window
Printer - This edit control displays a description of the currently selected printer. To select another printer or change the setup of the selected printer, press the "Setup" button.
Orientation - Select either "Portrait" or "Landscape". In portrait mode, the columns go across the narrow edge of the page. In landscape mode, they go across the wide edge of the page. The report always shows the columns currently selected in the Quantity Worksheet Window. Columns will be compressed if necessary to fit across the page.
Include all items - Select this option to print all items in the worksheet, whether they are currently displayed in the Quantity Worksheet Window or not.
Include all items currently shown in the worksheet - Select this option to print all items currently displayed in the Quantity Worksheet Window. Items scrolled out of view will be printed.
Include all items through level - Select this option to print all items down to a specified level, whether they are currently displayed in the Quantity Worksheet Window or not. Use the spin control to set the desired level. The Project itself is considered level zero. The top level items are level one.
Print the selected area - This option will only be enabled if you have selected a rectangle of cells on the Quantity Worksheet. (See Transferring Information to Other Applications.) If you check this option, only the selected columns and rows will be printed.
Include measurements - Check this box if you want the measurements assigned to items to be included in the report.
Include annotations - Check this box if you want the annotations assigned to items to be included in the report.
Hide unused items - If this box is checked, unused branches will be omitted from the report. A branch is considered unused when it meets the following conditions:
- It has no measurements or annotations assigned to it
- If it uses a formula, the result of that formula is zero
- Any child branches are also unused
If you select "Include all items currently shown in the worksheet" or "Print the selected area", this box will be set to match the setting in the quantity worksheet toolbar and the checkbox will be disabled.
OK - Press this button to print the report. Once the report is printed, you will return to the Quantity Worksheet Window.
Cancel - Press this button to cancel report printing and return to the Quantity Worksheet Window.