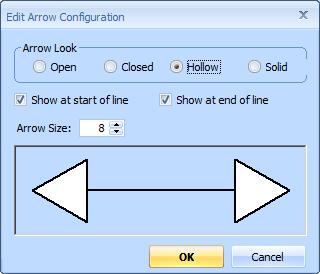
This window is used to enter or change the arrow configuration for line annotations. This window is invoked from the Annotation Ribbon Bar’s arrow button.

Figure 1: The Arrow Settings Window
Arrow Look – This determines the look of the arrow. It can be any of the following:
- Open – The arrow consists of two simple lines
- Closed – The arrow consists of two simple lines plus a line connecting the end points.
- Hollow – The arrow is a hollow triangle
- Solid – The arrow is a solid triangle
Show at start of line – Check this box to display an arrow at the start of the line annotations (the first point).
Show at end of line – Check this box to display an arrow at the end of the line annotations (the last point).
Arrow size – Set this number from 1 to 10 to adjust the size of the arrows. You can enter a number or use the spin buttons to increase/decrease the size.
Sample Display – This window displays a sample of what the arrows will look like for the current settings.
OK – Press this button to complete the arrow configuration and return to the main window.
Cancel – Press this button to discard changes made to the arrow configuration and return to the main window.